How to turn a garden shed into a photo studio

In addition to designing textiles for Made on 23rd, I love to style still-life photos. It all started with a 100 day project..... I challenged myself to style a photo every morning for 100 days and post it on Instagram. I refer to this as my "creative warm up" and called it The Good Morning Project. I enjoyed the project so much that I continued it after the 100 days were finished.
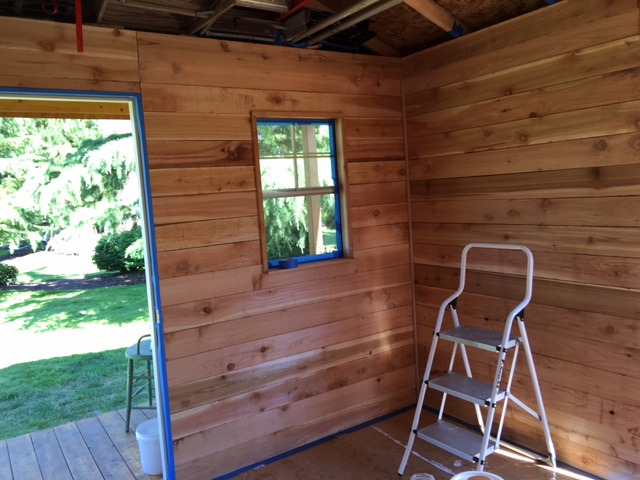
Over the past year I accumulated a few backdrops and props and needed a place to store them. So....I cleaned out a corner of our garden shed and we got to work transforming it into a "photo studio" which I now call "my own little corner".
I chose the corner with a window and a door so I could create a bit of a "cottage feel".

We started the transformation by applying cedar fence boards to the walls and around the window and door.


And when that was finished....we nailed a piece of trim in the corner to add a little design detail. Then my husband added a shelf in the window (which I LOVE!) and trimmed the window with a piece of wood we found at a salvage yard.

And then it was time to paint!!! What color you ask?....well....WHITE....of course!

Prepare to paint....bring out the blue tape!
Taping finished....ready, set, paint!
I was prepared to apply two coats of paint but I liked the whitewash look of one coat....soooo....that was a happy accident and it saved a lot of time!

And....in typical fashion of my projects....saving time in one area means there's time for another project!
Behind the door was a perfect place to create storage. I didn't want to take up floor space so I opted to put shelves between the studs.

Add shelves here...
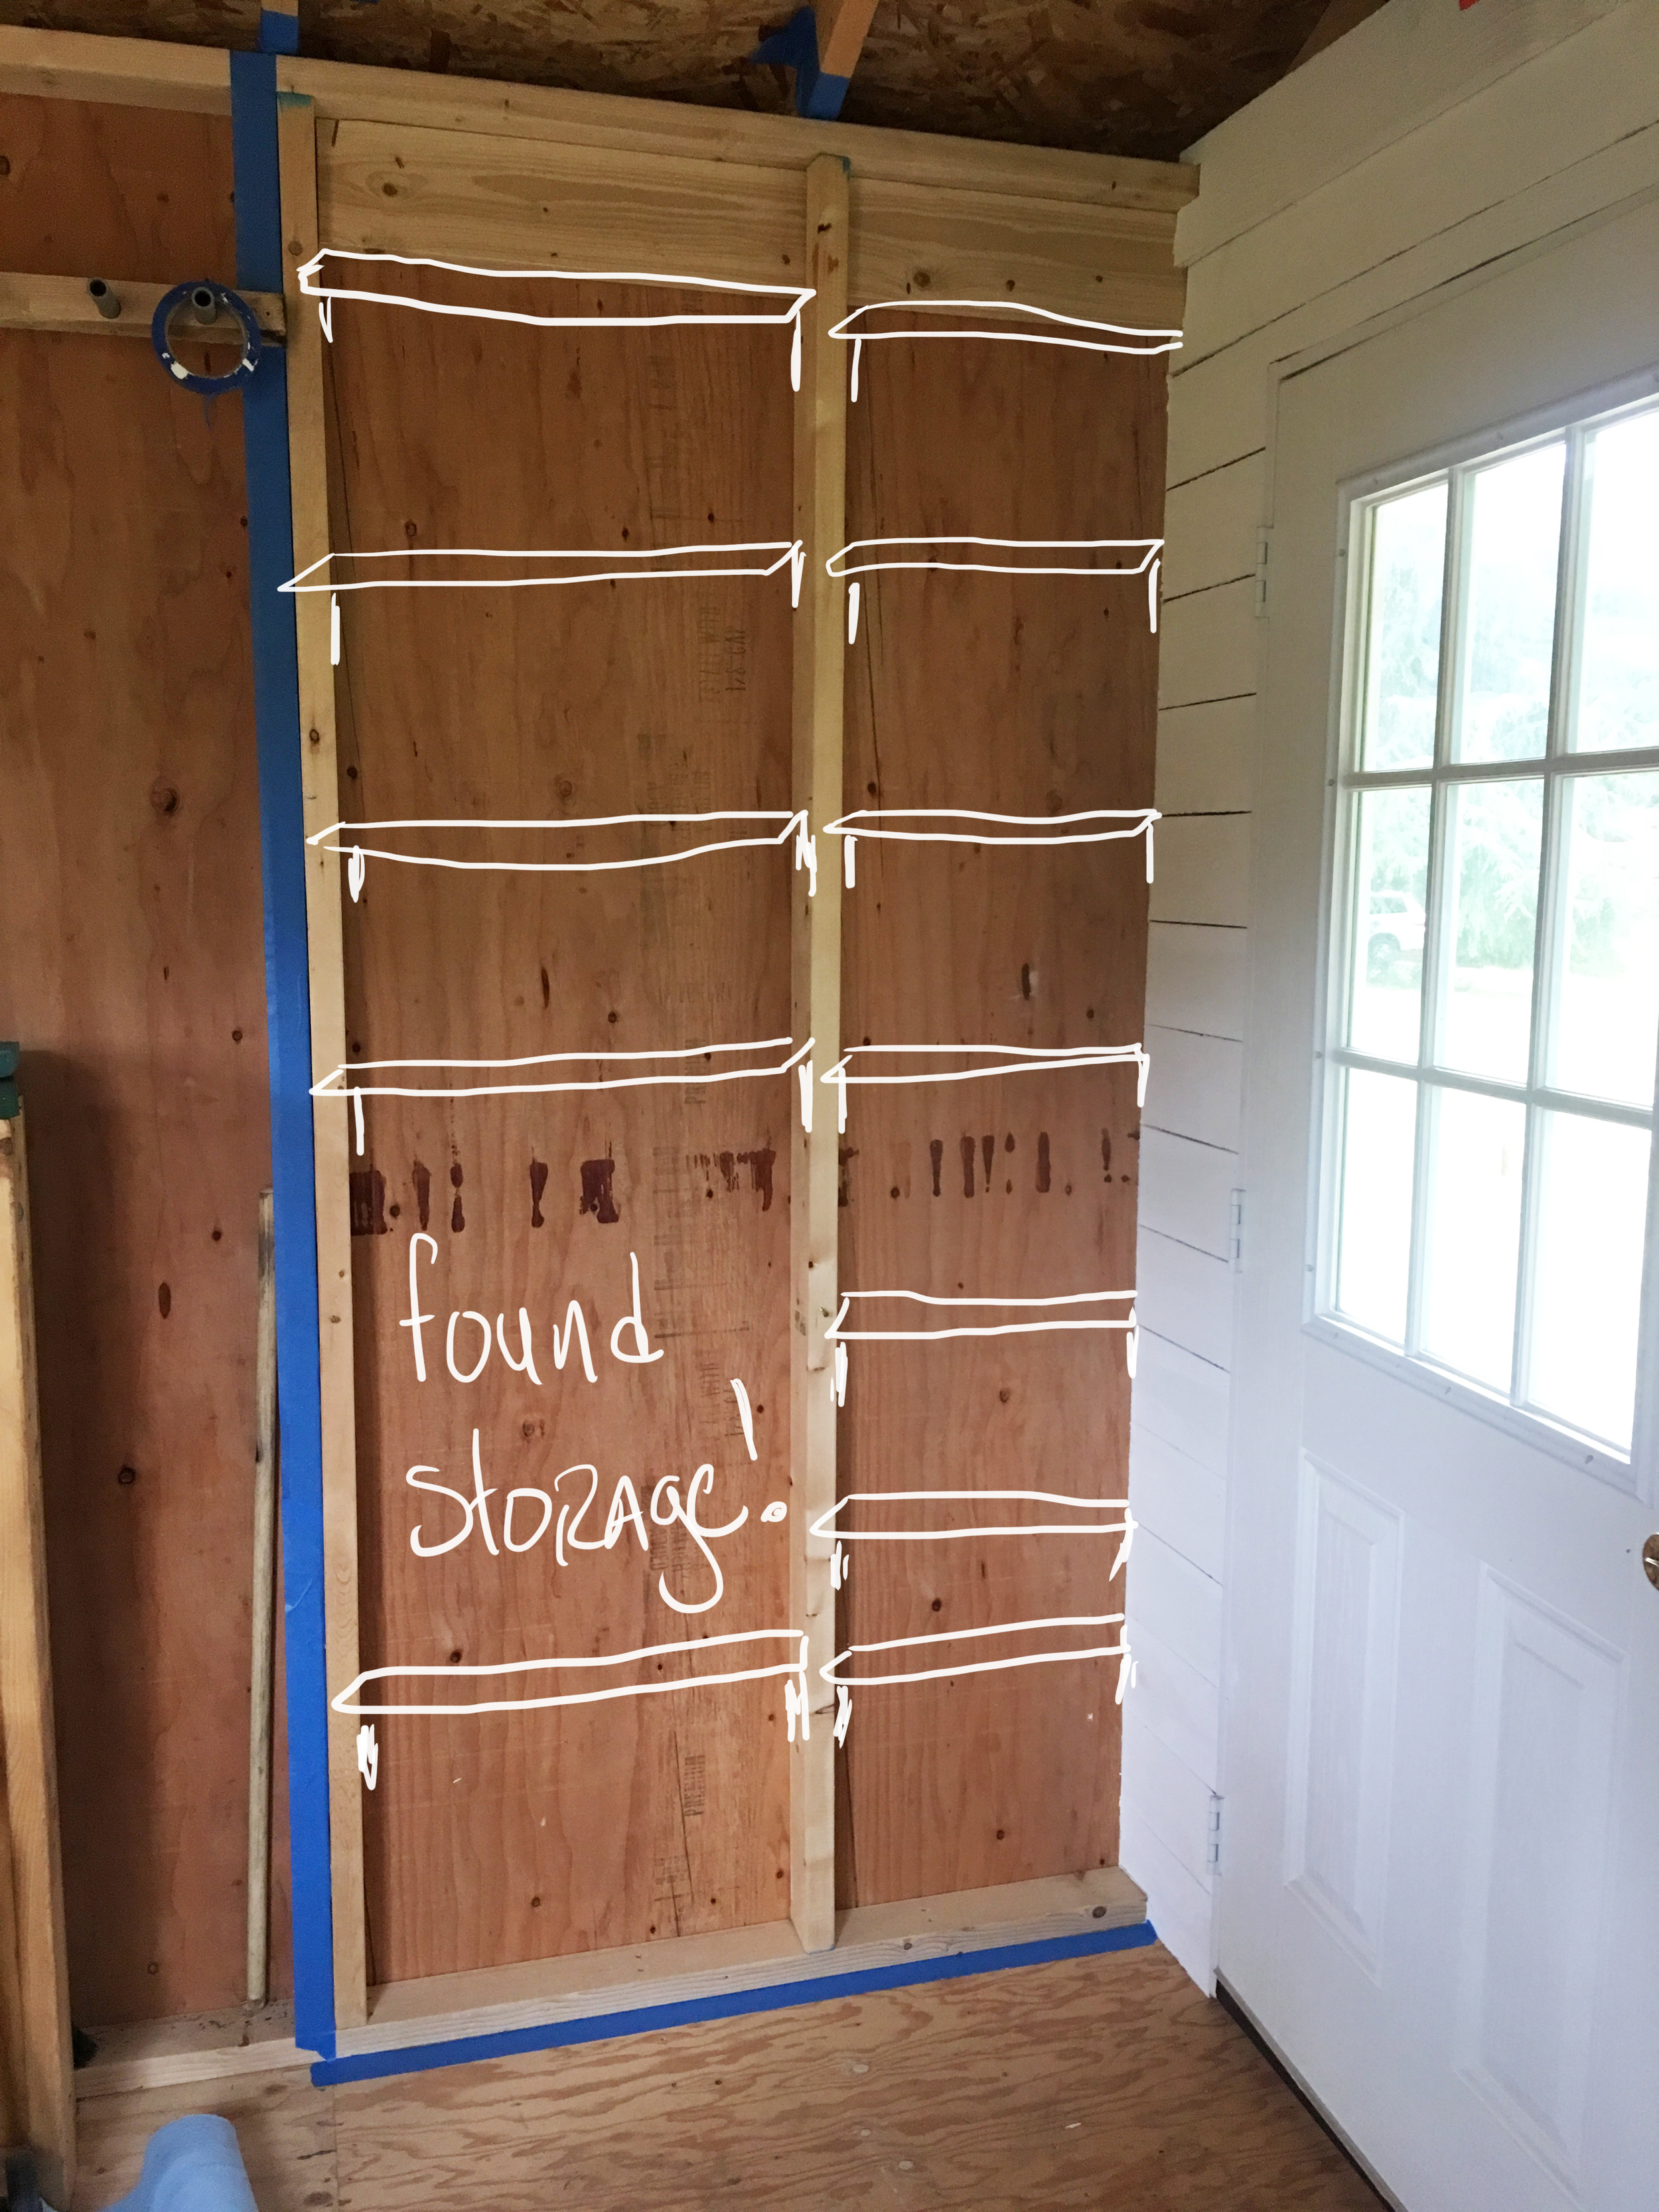
Rough sketch of shelving
I painted the walls and studs white.....

Then we cut 36 braces and attached them to the studs.

Cutting the braces for the shelves.

Shelf brace

Shelf braces installed and painted
Then it was time to add the shelves. We had a few extra cedar fence boards left over from the walls.....so....that's what we used.

Tim installing the shelves.

The shelves were installed and I was so excited to "move in" that I decided to leave the shelves "all-natural". I may paint them white in the future.....or maybe I won't....
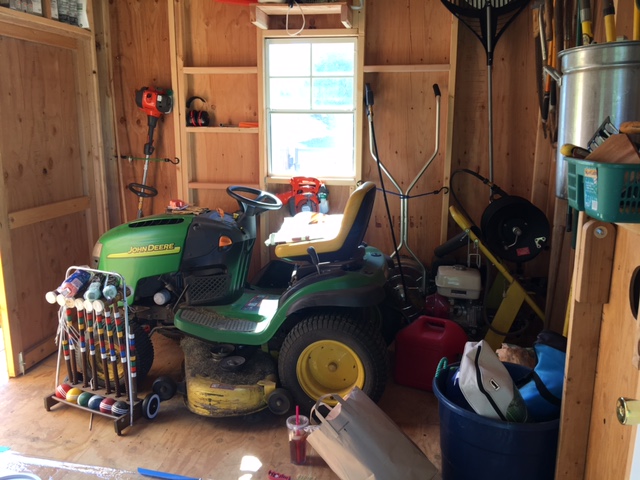
Look at all that storage!!!

And then it was finished!!! I can nail holes in the walls, move things around, and open or close the doors for different light affects. I have total freedom in "my own little corner" of the shed! Sharing is a wonderful thing....don't you think?

My side....
His side....
And then....the first photos in the new space!


I'm singing...."In my own little corner in my own little chair, I can be what ever I want to be!
I hope you have been inspired to find your "own little corner"!
